Orange Chicken Vegetable Stir-Fry

Source: jujugoodnews.com via Jennifer on Pinterest

Yield: 4-6 Servings

Ingredients

Sauce:
1/2 cup orange juice
2 tablespoons soy sauce
2 tablespoons rice vinegar
1 tablespoon oyster sauce
1 tablespoon orange zest
2 large cloves garlic
1 teaspoon minced ginger
optional sweetener like sugar, honey, agave, etc.

Stir-fry:
1 pound chicken tender cut into cubes
salt and pepper
3 tablespoons corn starch
4 cups chopped vegetables such as broccoli, carrots, celery, mushroom, snap peas, etc.
olive oil
1/2 cup medium yellow onion, chopped

Directions

1. Blend all the ingredients for the sauce in a blender or food processor for 10 seconds.

2. Taste the sauce and add your choice of sweetener to your liking.

3. Blend again for a few more seconds.

4. Heat the sauce in a large skillet on medium-high heat for 5 minutes. Carefully transfer the sauce to a heat proof bowl.

5. Rinse the skillet clean.

6. Season the chicken with salt and pepper.

7. Add the corn starch and massage the chicken with your hands.

8. If using fresh broccoli or green beans, boil the broccoli for 3-5 minutes until soft enough to pierce with a fork yet firm.

9. Transfer the vegetables to a plate lined with a paper towel.

10. Wipe down the skillet until dry.

11. Heat approximately 1 tablespoon of oil in the skillet on medium-high heat.

12. Cook the onion and chicken until the chicken is cooked through, approximately 3-4 minutes.

13. Add the remaining vegetables and stir-fry them together for 2 minutes.

14. Slowly add a few tablespoons of sauce while stirring the vegetables and chicken.

15. Continue to add the sauce a few tablespoons at a time, allowing about 15 seconds between each addition to allow sauce to slightly cook down.

16. Spoon the stir-fry over a bowl of hot rice. Serve immediately.

Homemade Chicken Nuggets

On our quest to start eating healthier, I have been collecting some meals that have natural ingredients and as little preservatives as possible. One of them is homemade chicken nuggets. Being mom to schooling children, it is always challenging coming up with new food for them to take to school lunches. (and easy to prepare in the mornings too). It’s as challenging as keeping the pool supply in the community gym pool clean for a week!

I found this recipe online and can’t wait to try it:

Source: 100daysofrealfood.com via Aggie on Pinterest

Homemade chicken nuggets-Tried these and not only are they some of the best chicken nuggets i’ve had, they cost less than a bag of processed nuggets, and I once cooked up and popped in the freezer I have the same ease as store bought nuggets-very excited about this!! Plus there is a great honey mustard dip at the bottom of the recipe :).

Turbo Broiler

To help me eat healthier, we bought a stove top grill and a turbo broiler. A turbo broiler is a popular appliance in the Philippines. It helps you cook meat and chicken (even fish) without the oil. You can think of it as a cross between oven baking and grilling. This way, I will not eat too much food with oil and would not need hoodia gordonii pills to help me lose weight.

A Turbo Oven is really quite simple to operate but if you want to make sure you knew how to use it properly first, have a look at the following video and see how easy it is to have a beautifully-roasted chicken in just 40-45 minutes!

A Turbo Oven / Cooker / Broiler is a table top oven that uses convection heat and therefore cooks 50% faster than regular ovens so if you’re adapting a regular oven recipe, remember to cut cooking time in half and lower the temperature of the turbo by about 50 degrees fahrenheit. Don’t worry because there will be some examples later in the page.

You can also prepare healthy and delicious dishes with it. There is no need to rub meat with oil or butter for a tender and juicy roast because the circulating hot air perfectly browns and sears the outside of the meat, sealing in the juices to preserve flavor and moisture. You can opt to let the fat drip onto a baking pan, placed under the wire rack in the oven, for a flavorful, delicious and satisfying meal minus the guilt.


  • It’s versatile. A turbo oven can bake, steam, broil, grill, roast, and even thaw frozen food.
  • It’s very easy to use. Just throw all your ingredients together in a baking pan (or a few sheets of foil), place it on the wire rack that comes with the oven, cover, switch it on, set the temperature and timer and voila! You can go on doing other things while the oven cooks your food.
  • It lets you save on time. Because it uses convection heat, it’s hotter and therefore cooks up to 50% faster than regular ovens so you can make more in a lot less time. It also requires no preheating so you can just go ahead, put your food in and relax.
  • It lets you save on space. Unlike oven ranges, turbo ovens are portable and can easily fit on a kitchen counter or table top. If you’re short on space, getting one would be a practical solution as you can cook practically anything with it.
  • It lets you save money. Turbo ovens are a practical and economic choice for your kitchen, requiring 80% less electricity than a conventional oven. Like I mentioned above, they can cook anything and they cost a fraction of what an oven range does. If you have a small family and don’t do heavy-duty cooking and baking, a turbo is definitely a smart choice.
  • It lets you cook healthy. Preparing food in a turbo, like chicken for example, doesn’t require extra fats or oils to guarantee that you’ll always end up with crispy, golden-brown skin and flavorful, juicy meat. The circulating hot air perfectly browns & sears the outside of meat and seals juices inside to preserve flavor and moisture.
  • It’s not hazardous to your health. Because the turbo oven doesn’t use the harsh radiant elements of a microwave or a conventional oven, heating is more gentle and more thorough and the flavor of your food is kept intact. Notice that when you cook with a microwave, heating is uneven – hot outside but cold in spots?
  • It keeps your kitchen clean and fresh. It’s smokeless, odorless and won’t heat up your kitchen.
  • It’s easy to clean up. I usually place the food on a baking pan or on a wire rack (with a baking pan beneath for catching drippings) so my food doesn’t actually touch the inside of the oven. After using, I just take the food out and then wipe the vessel clean with paper towels. That’s it!

Why Eat Chicken?

The main purpose of meat in any diet is to provide a source of protein. However, many meat sources like pork and beef may also have high fat content. If you want a healthy diet  choose the meat carefully. One good meat source that you can include in your diet is chicken. Read on to find out more benefits to eating chicken.

  • Lean, high quality protein. This is the type of protein that chicken offers. There are numerous chicken recipes from tidingsmag.com that will help you concoct high protein dishes.
  • Niacin. Niacin is a B-vitamin that helps protect the body against cancer. Include a four-ounce serving of chicken in your recipes to fulfill around 72% of the daily niacin requirement of the body.
  • Selenium. An essential mineral required by many major metabolic pathways, Selenium can be found in good quantities in chicken.
  • Vitamin B6. This vitamin, which can also be found in good quantities in chicken, helps support the energy metabolism of the body.
  • Phosphorus. An essential mineral that can also be found in chicken meat, phosphorus helps maintain the health of teeth and bones. It also assists in the healthy functioning of the liver, the kidneys, and the central nervous system.

If you want to lower the fat in your chicken dish, go for the breast part of the chicken. This part is lower in fat than the chicken thigh. Also, if you want healthy recipes choose those for grilled chicken.

Chicken and Ham with Cheese Rolls, Chicken Cordon Bleu Rolls

I think I need to give this a try – my kids are getting tired of what I usually serve them everyday. And since we only eat chicken nowadays, this would look like it’s not! :)

image

Ingredients:
3 large skinless chicken breasts, de-boned
10 pcs. sliced sweet ham, each slice divided into 4 strips
1 block quickmelt cheese, sliced into 1/4″ strips
white pepper powder
salt
lumpia, spring roll wrappers, about 40 pcs.
1/2 cup flour
2 cups bread crumbs
cooking oil
2 tbsp butter
2 tbsp cornstarch
1 cup milk
Cooking procedure:


Preparing the chicken: Slice chicken breast into thin slices. Place chicken slice in between waxed kitchen paper and using a kitchen mullet pound the chicken slices to make it thinner. Cut the chicken slices to about 2” X 4”sheets, keep aside.

To Assemble: In a large plate place one piece of lumpia wrapper. Place on top 1 sheet of chicken followed by ham then the cheese strips. Roll lumpia wrapper halfway, fold both ends, now fully roll and wet the end of flap with water to seal. Repeat process with the rest and keep aside.

Wrapping batter: Dilute the flour with water just enough to form a sauce like batter.

Frying: Heat generous amount of oil in a wok. Now dip each roll in the wrapping batter then roll in the bowl of breadcrumbs until evenly coated. Deep fry at medium to low heat for 2-3 minutes or until it turns to golden brown.

Dipping sauce: To make the roux heat butter in a pan until it start to smoke, stir in the cornstarch until it forms into a lump. In a separate sauce pan heat the milk until it start to boil. Add in the roux and simmer for 1 to 2 minutes stirring occasionally until sauce thickens. Season with salt and white pepper to taste.

Grabbed from here:

http://overseaspinoycooking.blogspot.com/2009/11/chicken-and-ham-with-cheese-rolls.html

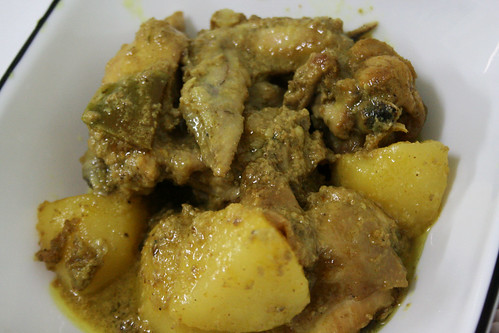
Chicken Curry

All my calorie counting flew out the window today because of this yummy dish:

Chicken Curry

One serving of this delicious meal is a whopping 614 calories!!! Look at the oil, which is the main culprit why it is so delicious in the first place! Good thing I do not have oily skin, I’d need a natural acne cleanser for this!

Ingredients :

  • 2-3 tbsp. oil
  • 3 potatoes, peeled, quartered and fried
  • 1 lb. chicken, cut into serving pieces
  • 3 cloves garlic, minced
  • 1 large onion, quartered
  • 1 tbsp. patis (fish sauce)
  • 3 tbsp. curry powder
  • salt and pepper
  • 1 cup water
  • 1 red bell pepper, cut into big squares
  • 1 green bell pepper, cut into big squares
  • 3 celery stalks, cut into 1-1/2” long
  • 1 cup coconut milk or evaporated milk

Cooking Procedures :

  1. Pan fry potatoes. Set aside.
  2. In the same pan, fry chicken pieces and brown a little.
  3. Add garlic and onion. Sauté for a few minutes until soft.
  4. Pour in patis and season with curry powder, salt and pepper. Stir for 2 minutes.
  5. Add water. Cover and bring to a boil. Lower the heat; add celery, bell peppers and fried potatoes. Simmer for 3 minutes or until half done.
  6. Add milk and stir occasionally. Cook for another 7 minutes (or lesser when using evaporated milk because the liquids will curled).
  7. Remove from heat. Serve hot.

More Recipes.

I am trying to cook more at home and since I really do not know how to cook, it has been hard trying to come up with different recipes everyday, especially if you have kids under 10 as your main eaters. Plus, I only cook chicken these days as I am trying to stay away from pork. It has been proven effective as I do not have breakouts anymore nor need an acne pill.

I am trying to cook in batches because I do not have time to spend hours everyday in the kitchen when I need to work, clean up the house and look after my kids, so this one might be interesting. My son loves toppings!


Recipe: Kip Saté a La Mina

Ingredients:

  • chicken breasts or fillet
  • garlic
  • onion or scallions ( I used scallions coz TS doesn’t like onions)
  • soy sauce
  • vinegar
  • ketchup
  • sugar ( I used granulated white)
  • peanut butter

Procedure:

  1. Chop onions or scallions and cut chicken into cubes.
  2. Heat pan and add cooking oil.  When it is hot enogh, add the chicken and cook it to brown.
  3. Once brown, you can either take the chicken out of the pan or toss them on the side as you make a place to sauté the garlic and then the onions or the white part of your scallions.
  4. Season with soy sauce and stir.  Add a small amount of water to cook the chicken more.
  5. Then add a little bit of vinegar to neutralize the flavor.  Stir.
  6. Squeeze in some ketchup to give a sweet taste.  Stir.
  7. If you’re using scallions, now is the time to add the green leaves of it.
  8. Stir in about two tablespoon or so of peanut butter and remove from heat.  The peanut butter will thicken the sauce and will give the soul of this dish.
  9. Serve with rice and some love!

You can top it on plain white rice or side it with flavored rice.  I served mine with Cheddar Broccoli Rice and the flavor is overpowering.  I think this dish is best with plain white rice.  It was a knock out!  Try it and see for yourself.  With this recipe, everyone can cook!

Recipe: Breaded Chicken with Lemon Glaze

Breaded Chicken with Lemon Glaze
I would be doing this for the kids. They always love fried chicken so this would be a welcome variation.

We are trying to eat less pork and beef so this will perfect.


Spend quality time with your loved one with this crispy-on-the-outside, juicy-on-the-inside lemony-sweet dish.

Serves
Prep Time 10 minutes  Cooking Time 15 minutes

3 chicken breasts, deboned and cut into strips
salt and pepper to taste
1/2 cup flour
1 large egg, beaten
1/2 cup Japanese breadcrumbs

For the lemon glaze
1 tablespoon cornstarch
1/2 cup water
3 tablespoons lemon juice
3 tablespoons honey
parsley for garnish

1
Season chicken with salt and pepper. Coat with flour, followed by beaten egg, then with breadcrumbs. Fry chicken in oil until golden.
Set aside.
2 Make the glaze: Dissolve cornstarch in water then throw this mixture in, along with all the other ingredients, in a saucepan. Cook and stir over medium heat, until it boils and becomes slightly thick. Drizzle glaze on chicken or serve on the side. Garnish with parsley.

Yummy tip:
Prefer a stronger tangy flavor? Add 2 tablespoons lemon juice and 1 tablespoon honey to the recipe.

Technorati Tags: Breaded Chicken with Lemon Glaze